maid service in washington dc

A clean home is not only visually appealing but also crucial for maintaining a healthy and comfortable living environment. Whether you’re preparing for a seasonal deep clean or want to ensure every corner of your home is spotless, having a comprehensive checklist can make the process more manageable and effective. Below, we’ve outlined a detailed cleaning guide for every room in your home.

Living Room Cleaning Checklist

The living room often serves as the central hub of the house, making it prone to dust and clutter.

  • Dust all surfaces: Wipe down shelves, tables, light fixtures, baseboards, and other flat surfaces.
  • Clean upholstery: Vacuum sofas, chairs, and any cushions. Spot-clean stains with an appropriate cleaner.
  • Vacuum carpets and rugs: Remove dust particles trapped in fibers by vacuuming each area carefully. For stubborn stains, consider steam cleaning.
  • Wipe electronics: Use microfiber cloths to clean TV screens, remotes, and other gadgets.
  • Tidy up décor items: Dust picture frames, knick-knacks, and decorative pieces.

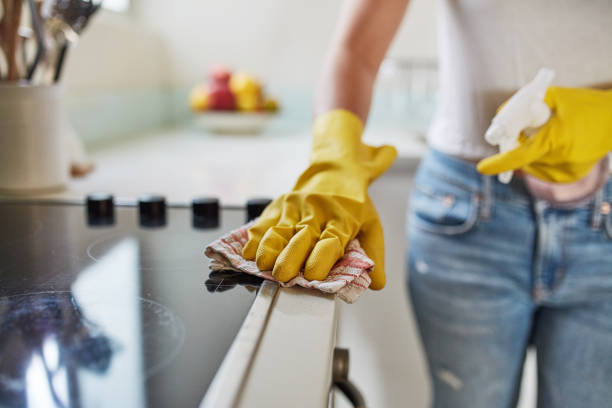
Kitchen Cleaning Checklist

The kitchen sees heavy use daily. A deep clean ensures hygiene is maintained where food preparation occurs.

  • Clear countertops: Remove appliances or utensils before cleaning with an all-purpose spray.
  • Stove/oven: Scrub stovetops; use degreaser on oven interiors.
  • Refrigerator: Empty shelves, toss expired food items, then wipe down surfaces.
  • Microwave: Steam-clean using water with lemon juice to loosen grime before wiping.
  • Sanitize sinks: Scrub sink basins and faucets with baking soda or disinfectant cleaner.
  • Cabinets and drawers: Remove items; vacuum crumbs; wipe interior surfaces before organizing items back.

Bathroom Cleaning Checklist

Bathrooms require special attention to remove soap scum buildup and maintain cleanliness.

  • Scrub tiles & grout: Use a mix of baking soda paste or grout cleaners to tackle grime effectively.
  • Disinfect toilet bowls & seats: Apply toilet cleaner under rims; scrub thoroughly using a brush.
  • Wipe mirrors & glass doors: Spray glass cleaner for streak-free results on mirrors and shower doors.
  • Clean faucets using vinegar or mild cleaning agents to remove water stains or mineral buildup.
  • Declutter counter space by organizing toiletries neatly into storage containers.

Bedroom Cleaning Checklist

A deep-cleaned bedroom promotes better sleep quality by eliminating allergens like dust mites.

  1. Strip bedding entirely (sheets/pillowcases). Launder them at high temperatures if possible.
  2. Dust furniture such as nightstands/dressers using microfiber cloths specifically targeting lampshades too!
    3.

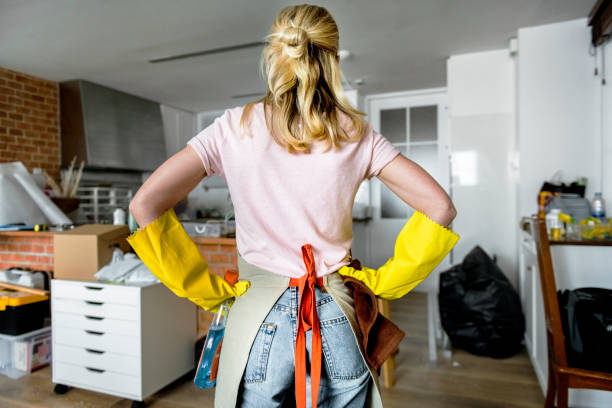
Expert Tips to Get Started with Maid Service Washington DC

Hiring professional maid services can transform your home into a clean, organized, and stress-free space. However, to make the most of these services and ensure an efficient experience, there are a few expert tips to consider. Below is a guide to help you get started with professional maid services seamlessly.

How to Research and Choose the Right Cleaning Company Washington DC

Not all cleaning companies are created equal. To find the best fit for your needs, it’s essential to research thoroughly.

  • Read Reviews and Testimonials: Look for reviews on trusted platforms like Google, Yelp, or social media pages. Pay attention to recurring themes in customer feedback regarding reliability and quality of service.
  • Check Credentials: Verify that the company is licensed, insured, and bonded. This protects both you and their employees in case of any accidents or damages during cleaning.
  • Ask About Service Offerings: Some companies offer general cleaning only, while others include deep cleaning services or specialized add-ons like carpet shampooing or window washing.
  • Evaluate Pricing: Request quotes from different providers and compare them carefully. Be sure that pricing is transparent with no hidden fees.

Clearly Communicate Your Needs with Maids Washington DC

Professional maids are skilled at what they do, but clear communication ensures they cater specifically to your priorities.

  1. Walk through your home and note areas requiring special attention (e. g. , stubborn stains on carpets, kitchen grease buildup).
  2. Communicate these areas explicitly when scheduling the service.
  3. Decide whether you need one-time deep cleaning or ongoing maintenance (weekly/bi-weekly/monthly).
  4. If you have preferences for eco-friendly products or specific cleaning methods (e. g. , steam mops instead of chemical sprays), let them know upfront.

Get Your Home Ready with House Cleaning Washington DC Services

Although maids are there to clean for you, preparing your home ensures they can focus on deeper tasks rather than organizing clutter.

  • Declutter Common Areas
    Remove stray items like toys, clothes, or paperwork from floors and surfaces so cleaners can work efficiently without having to move things around unnecessarily.
  • Secure Valuables
    For peace of mind, store away personal valuables such as jewelry or important documents.
  • Provide Access Instructions
    Whether it’s sharing door codes or leaving keys in a secure location, ensure cleaners can access your property easily while maintaining security protocols.

Ask Questions About Their Cleaning Process

To set expectations properly for both parties: – Inquire about the equipment and supplies they’ll bring versus what you’ll need to provide. – Ask if their staff undergoes training regularly. – Confirm whether the same team will consistently clean your home for familiarity.

Benefits You’ll Experience With Professional Maid Services

Proper preparation enhances not only efficiency but also satisfaction with the results of professional maid services. Once everything is in place: – Enjoy better time management by offloading household chores. – Increase cleanliness standards with professional-grade tools and techniques. – Reduce stress by maintaining a consistently tidy living environment.

By following these tips before hiring professional maid services, you’re setting everyone up for success—yourself as well as the cleaners tasked with making your home sparkle effortlessly! Click here for professional maid services in Washington DC maidtoplease.com/washington-dc-cleaning-services

Step-by-Step Guide to Deep Clean Your Kitchen Like a Pro

A thorough kitchen deep clean not only enhances the aesthetics of your space but also promotes hygiene and safety. Whether you’re preparing for a special occasion or simply maintaining your home, following a step-by-step cleaning process can make the task efficient and manageable. Here’s how you can deep clean your kitchen like a professional.

Step 1: Gather Cleaning Supplies

Before starting, ensure you have all the necessary materials at hand. Having the right tools will save time and effort.

  • Microfiber cloths: For wiping surfaces without leaving lint.
  • Sponges: Use separate sponges for different areas to avoid cross-contamination.
  • Scrub brushes: Ideal for stubborn grime in corners or on grout.
  • All-purpose cleaner: Effective for various surfaces like counters and cabinets.
  • Degreaser: Essential for tackling greasy stovetops and walls.
  • Glass cleaner: For shiny, streak-free glass surfaces.
  • Baking soda and vinegar: Natural solutions for tough stains and odors.
  • Mop or steam cleaner: For floor cleaning.

Step 2: Empty Cabinets, Drawers, and Pantry

Remove all items from cabinets, drawers, and the pantry to inspect each space thoroughly.

  1. Discard expired food items or products that are no longer useful.
  2. Wipe down shelves with an all-purpose cleaner or a solution of warm water and mild soap.
  3. Replace shelf liners if they are worn out or stained before putting items back.

Step 3: Clean Appliances Inside Out

Kitchen appliances accumulate grease, food particles, and dust over time.

Appliance Cleaning Tips
Refrigerator Remove shelves/drawers; wash them with warm soapy water. Wipe interior walls with baking soda solution to eliminate odors.
Oven Use an oven cleaner or baking soda paste to remove burnt residues from racks and inner walls.
Microwave Heat a bowl of water with lemon juice inside it to loosen food splatters before wiping clean with a microfiber cloth.
Dishwasher Run an empty cycle with white vinegar to remove mineral buildup.
Toaster/Blender Shake out crumbs (toaster) or disassemble parts (blender) for thorough cleaning using warm soapy water.

Step 4: Clean Surfaces Thoroughly

Countertops, backsplashes, sinks, stovetops—these areas see daily use in any kitchen.

  • Use cleaners suited for the countertop material (e. g. , granite-safe cleaners for stone).
  • Pay attention to edges where crumbs may collect.
  • Wipe tiles with an all-purpose cleaner; scrub grout lines with a brush if needed.
  • Sprinkle baking soda around the sink basin; scrub gently before rinsing away residue.
  • Polish faucets using white vinegar or glass cleaner for a spotless shine.

Step 5: Floors Last

  1. Sweep thoroughly to collect crumbs/debris that may have fallen during cleaning.
  2. Mop using a solution suited for your flooring type (e. g. , hardwood-specific cleaners vs tile-safe detergents).
  3. For heavily stained grout in tiled floors, use a mixture of baking soda paste applied directly onto problem areas before scrubbing gently.

Pro Tips for Efficient Kitchen Deep Cleaning

  1. Start at higher surfaces (like cabinet tops) and work downward to avoid dust falling on already-cleaned areas.
  2. Divide large tasks into manageable sections when short on time—set aside one day just for appliances or floors if needed.
  3. Avoid harsh chemicals around food-preparation spaces; opt instead for natural alternatives like diluted vinegar solutions when possible.

By following these steps diligently along with consistent maintenance between deep cleans, you’ll keep your kitchen looking pristine while ensuring it remains safe from bacteria buildup long-term!

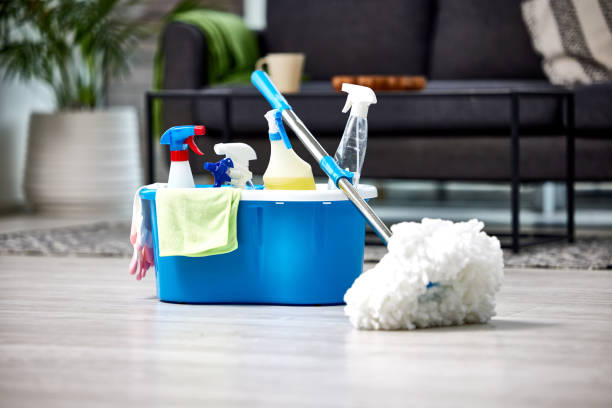
Essential Materials Needed for a Thorough Cleaning Experience

When it comes to achieving a spotless and hygienic home environment, having the right materials on hand is essential. A comprehensive cleaning session requires specific tools, supplies, and products designed to tackle dirt, grime, and stubborn stains. Below is a detailed guide to the essential materials needed for an effective and efficient deep cleaning experience.

Cleaning Tools

Investing in high-quality cleaning tools ensures your tasks are done more effectively and with less effort.
Microfiber cloths: Perfect for wiping surfaces without leaving lint behind. They are reusable and highly absorbent.
Scrub brushes: Ideal for scrubbing tiles, grout lines, or other tough-to-clean surfaces. Choose one with durable bristles that can handle heavy-duty cleaning.Vacuum cleaner: Opt for a model with attachments designed for different floor types, upholstery, or hard-to-reach areas like corners or curtains.Mop: A microfiber mop is especially effective for hardwood or tile floors as it traps dust and dirt efficiently.Dustpan and broom: Essential for sweeping up debris before mopping or vacuuming.Extendable duster: Perfect for reaching ceiling fans, light fixtures, and other high places without using a ladder.

Cleaning Products

Choosing the right cleaning products ensures that you can tackle various surfaces safely while achieving an impressive shine.All-purpose cleaner: Suitable for most household surfaces such as countertops, sinks, and appliances.Glass cleaner: Achieves streak-free windows, mirrors, and glass doors.Disinfectant spray/wipes: Essential for killing bacteria and viruses on high-touch points like door handles and switches. Bathroom cleaner: Designed to remove soap scum from showers and tubs while sanitizing sinks and toilets.Degreaser: Great at cutting through stubborn grease in the kitchen around stovetops or vent hoods.Wood polish/cleaner: Helps protect wooden furniture while enhancing its natural shine.

Miscellaneous Supplies

Some often-overlooked items can make your cleaning process smoother: 1. Trash bags – Make sure to have multiple sizes available to handle trash from different areas of your home.
2. Sponges – Useful for washing dishes or scrubbing dirty surfaces; keep separate sponges designated by task (e. g. , kitchen versus bathroom).
3. Gloves – Protect your hands from exposure to harsh chemicals by wearing durable rubber gloves while cleaning.
4. Buckets – Needed not only when mopping but also to rinse sponges or carry supplies between rooms.

Category Materials Purpose
Tools Microfiber cloths Dusting & wiping surfaces
Scrub brushes Tough surface scrubbing
Vacuum Cleaner Floors & upholstery
Products All-purpose cleaner General surface cleanliness
Glass Cleaner Streak-free glass/mirror maintenance
Supplies Trash Bags Waste collection
Gloves Hand protection from chemicals

Tips on Organizing Your Supplies

  1. Store your cleaning tools in one central location such as a utility closet or under the sink cabinet so they are easy to access when needed.
  2. Use caddies or bins to group similar items together (e. g. , bathroom cleaners in one bin; kitchen cleaners in another).
  3. Ensure all sprays are tightly sealed after use to avoid leaks.

By equipping yourself with these essential materials ahead of time, you’ll transform what might seem like an overwhelming task into an organized process that delivers outstanding results throughout your home.

How to Deep Clean Your Bathroom and Refresh Its Fixtures

A clean and refreshed bathroom contributes significantly to a healthier and more pleasant home environment. Below is a step-by-step guide to deep cleaning your bathroom, along with tips to freshen up its fixtures effectively.

Step 1: Gather Your Cleaning Supplies

Before diving into the cleaning process, ensure you have all the necessary materials.

  • Cleaning agents:Multi-surface cleaner, glass cleaner, toilet bowl cleaner, and tile/grout cleaner.
  • Tools:Microfiber cloths, scrubbing brushes (including an old toothbrush for tight spaces), mop, sponge, and bucket.
  • Protective gear:Rubber gloves and a face mask (if using strong chemicals).
  • Optional:Vinegar and baking soda for eco-friendly cleaning.

Step 2: Declutter the Bathroom

  1. Remove all items from countertops, shelves, and inside the shower/bath area.
  2. Dispose of expired or empty products like shampoos or skincare items.
  3. Temporarily relocate rugs and towels to avoid interference during cleaning.

Step 3: Start with Dusting

Use a microfiber cloth or duster to remove dust from surfaces such as: – Light fixtures – Shelves – Baseboards – Air vents

Ensure you also dust around less noticeable areas such as behind the toilet or under sinks.

Step 4: Clean Tiles and Grout

Tiles are prone to dirt buildup due to constant moisture exposure. Follow these steps: 1. Apply tile/grout cleaner or a mixture of vinegar and water directly onto the tiles. 2. Let it sit for 5–10 minutes for effective grime removal. 3. Scrub thoroughly using a grout brush or an old toothbrush.

For stubborn stains on grout lines, consider creating a paste with baking soda and water before scrubbing.

Step 5: Refresh Bathroom Fixtures

Fixtures like faucets, showerheads, and handles can accumulate limescale over time. Here’s how to clean them: 1. Wipe down fixtures with warm water first. 2. Use a limescale remover or white vinegar solution for hard water stains. 3. Buff chrome fixtures with a clean microfiber cloth for added shine.

Pro Tip: Soak showerheads in vinegar overnight to remove mineral buildup effectively.

Step 6: Sanitize Key Areas

Target high-touch areas such as: – Toilet handles
– Faucet levers
– Door handles

Use an antibacterial spray or disinfectant wipes to eliminate germs effectively.

Step 7: Scrub the Toilet Thoroughly

The toilet requires focused attention during deep cleaning: 1. Add toilet bowl cleaner into the bowl and let it sit for at least 10 minutes. 2. Scrub vigorously using a toilet brush. 3. Don’t forget to wipe down the exterior parts such as the seat hinges and base using disinfectant spray.

Step 8: Wash Glass Surfaces

For mirrors or glass shower doors: 1. Spray glass cleaner evenly onto surfaces. 2. Wipe in circular motions using a lint-free cloth or newspaper for streak-free results.

If there’s soap scum on glass surfaces, use warm vinegar with dish soap before wiping it away.

Step 9: Mop Floors

After tackling all other areas: 1. Sweep any debris off the floor first. 2. Mop floors with warm water mixed with floor cleaner suitable for your bathroom tiles/materials.

For extra shine on tile floors, dry-mop them after they’ve been cleaned thoroughly.

Tips for Maintaining Your Deep-Cleaned Bathroom:

To keep your bathroom fresh between deep cleans: – Use ventilation fans regularly after showers to reduce humidity levels. – Wipe down wet surfaces immediately after use. – Consider placing air fresheners or essential oil diffusers in corners of your bathroom space.

By following these steps systematically, you’ll achieve not only a sparkling clean but also an inviting bathroom environment suitable for relaxation at any time of day!

Effective Cleaning Service Washington DC: Deep Clean Your Living Room Surfaces and Upholstery

A clean and organized living room creates a welcoming space for relaxation and entertaining guests. However, maintaining this area can be challenging due to the variety of surfaces, furniture, and upholstery that require attention. Below are proven techniques to deep clean your living room effectively.

Preparing for a Thorough Living Room Cleaning

Before starting, gather all necessary cleaning supplies to streamline the process.

  • Microfiber cloths
  • Vacuum cleaner with attachments
  • Upholstery cleaner or mild detergent
  • Soft-bristle brush
  • Glass cleaner
  • Wood polish or multi-surface cleaner
  • Baking soda (optional for odor removal)

Step 1: Declutter the Space

Begin by removing any clutter from coffee tables, side tables, shelves, and seating areas. Place items like books, magazines, electronics, and décor in designated spots or storage containers. Decluttering ensures nothing obstructs cleaning surfaces while also promoting better organization.

Step 2: Dust All Surfaces Thoroughly

Dust accumulation can dull furniture finishes and trigger allergies.

  1. Use a microfiber cloth or an electrostatic duster to capture fine particles on hard surfaces such as tables and shelves.
  2. For ceiling fans or light fixtures, extendable dusters help reach high areas.
  3. Don’t forget baseboards — they often collect dirt over time. Use a damp cloth where necessary.

Step 3: Focus on Upholstery Cleaning

  1. Vacuum Regularly– Use the upholstery attachment on your vacuum cleaner to remove dust and crumbs from sofas, chairs, and cushions.
  2. Spot Treat Stains– Identify stains on fabrics and treat them immediately with an upholstery-safe solution or mild detergent diluted in water.

For leather furniture: – Wipe with a damp cloth. – Condition using specialized leather cleaners to prevent cracking.

Step 4: Clean Glass Surfaces

  • Spray glass cleaner onto microfiber cloths (not directly onto glass) to avoid streaks.
  • Wipe in circular movements until the surface is clear of smudges or fingerprints.

Step 5: Revitalize Carpets & Rugs

  1. Vacuum carpets thoroughly in multiple directions to lift embedded debris.
  2. Spot-clean stains using carpet-specific solutions.
  3. For deeper cleaning needs (e. g. , pet odors), consider steam-cleaning equipment or hiring professional services annually.

Step 6: Polish Wooden Furniture

  1. Dust wooden surfaces first with a dry microfiber cloth.
  2. Apply wood polish sparingly using another clean cloth; buff gently until shiny.
Material Recommended Cleaner Frequency
Fabric Upholstery-safe solution Weekly
Leather Leather conditioner Monthly
Glass Streak-free glass spray As needed
Wood Multi-surface/wood polish Bi-weekly/Monthly

By following these techniques consistently, you’ll create a spotless living room environment that’s both comfortable and visually appealing for everyone who enters your home!

Effective Strategies for Deep Cleaning Bedrooms, Surfaces, and Furniture

Deep cleaning your bedroom is essential not only for maintaining a healthy living environment but also for creating a calming and comfortable space. From surfaces to furniture, implementing the right strategies can make the process efficient and effective. Here’s how to tackle your bedroom like a pro.

Decluttering First: Prepare the Space

Before diving into deep cleaning, it’s crucial to declutter your bedroom. Removing unnecessary items allows you to clean more effectively.

  • Organize items: Sort belongings into categories such as “Keep,” “Donate,” or “Dispose.
  • Clear surfaces: Remove items from nightstands, dressers, and desks to access all areas.
  • Store seasonal items: Place out-of-season clothing or accessories in storage bins under the bed or in closets.

Dusting and Cleaning Bedroom Surfaces

Bedrooms are prone to accumulating dust on surfaces. Use proper techniques to ensure thorough cleaning.

  1. Dust ceiling fans, light fixtures, and high shelves first.
  2. Use a microfiber cloth or a duster with an extendable handle.
  3. Clean nightstands, dressers, windowsills, and baseboards using an all-purpose cleaner.
  4. For delicate materials like wood, use a wood-safe cleaner to preserve finishes.
  5. Use a vacuum attachment or brush tool to remove dust from corners where cobwebs often gather.

Cleaning Upholstered Furniture

Your bed frame, chairs, or any fabric-covered furniture also need attention during deep cleaning.

  • Vacuum the upholstery: Use a handheld vacuum with an upholstery attachment to remove dirt and debris.
  • Spot clean stains: Treat fabric stains with an appropriate cleaner. Always test it on an inconspicuous area first.
  • Wash removable covers: Check for removable cushion covers or slipcovers that can be machine washed according to label instructions.

Washing Bed Linens and Curtains

Fresh linens instantly elevate the cleanliness of your room while removing allergens like dust mites.

Item Recommended Frequency
Bedsheets Weekly
Pillowcases Weekly
Mattress protectors Monthly
Curtains Every 3 months

Ensure you launder these items according to their care labels for longevity.

Mattress Maintenance

A clean mattress contributes significantly to better sleep quality.

  1. Strip off all linens and vacuum the entire surface with a crevice tool.
  2. Spot-treat stains using baking soda paste (baking soda mixed with water) or enzyme-based cleaners.
  3. Flip or rotate your mattress if recommended by the manufacturer.

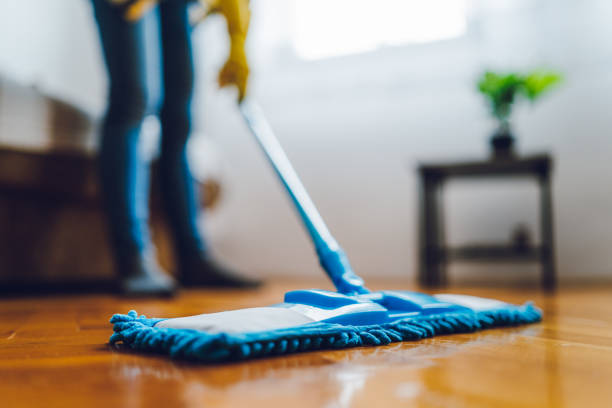
Flooring Care in Bedrooms

  • Vacuum thoroughly using overlapping strokes.
  • Spot-clean stains using carpet-friendly solutions.
  • Sweep or vacuum without a beater bar attachment.
  • Mop floors with a wood-safe cleaner and microfiber mop head.
  • Vacuum any debris first before mopping tiles with warm water mixed with mild detergent.

Deep cleaning bedrooms goes beyond basic tidying—it’s about creating a space that feels fresh while eliminating hidden dirt and allergens that may compromise your health over time. By following these effective strategies step-by-step, you’ll enjoy both aesthetic appeal and long-term comfort in one of the most personal spaces in your home.

The Ultimate Guide to Tackling Laundry Room Appliances and Floors

The laundry room is often one of the most overlooked areas in a home when it comes to deep cleaning. However, maintaining a clean and organized laundry space is essential, as it not only extends the life of your appliances but also ensures better hygiene for your clothing. In this guide, we’ll walk you through effective techniques for cleaning laundry room appliances and floors to achieve a spotless space.

Key Steps for Cleaning Laundry Room Appliances

  1. Run a Cleaning Cycle: Most modern washing machines come with a “clean washer” cycle. Use this feature monthly to eliminate detergent residues, mold, and odors.
    • Add 2 cups of white vinegar to the drum.
    • Run the machine on its hottest setting.
    • Wipe down the inside of the drum with a microfiber cloth after the cycle completes.
  2. Clean Rubber Gaskets: Mold tends to build up around rubber seals.
    • Mix equal parts vinegar and water.
    • Use an old toothbrush or soft cloth to scrub away grime.
  3. Check and Clean Filters: Detergent and fabric softener can clog filters over time. Refer to your machine’s user manual for instructions on safely removing and cleaning filters.
  4. Empty Lint Trap Regularly: Before or after every load, remove lint buildup from the trap to improve efficiency and prevent fire hazards.
  5. Vacuum Dryer Vents:
    • Disconnect the dryer from power.
    • Use a vacuum attachment or specialized vent-cleaning brush to remove lint from exhaust vents and ducts.
  6. Wipe Down Exterior Surfaces: Dust and residue can accumulate on top of dryers. A damp microfiber cloth with mild cleaner will suffice.
  7. Ironing Boards & Irons
    Ensure these tools are free from fabric residue or mineral deposits:
  8. For ironing board covers, wash them according to care labels.
  9. For irons, clean mineral buildup by running white vinegar through steam ports.

Best Practices for Cleaning Laundry Room Floors

  • Sweep or vacuum loose debris like lint or dirt particles.
  • Mop using warm water mixed with gentle floor cleaner designed for tiles.
  • Scrub grout lines with a baking soda paste (mix baking soda with water) using an old toothbrush.
  • Vacuum as needed before mopping.
  • Use mild dish soap diluted in warm water instead of harsh chemicals that may damage vinyl finishes.
  • Concrete Floors Concrete floors in unfinished laundry rooms require extra care:
    • Remove dust using a shop vacuum or broom.
    • Treat stubborn stains like detergent spills with baking soda paste.

Organizing Tips While Deep Cleaning

During appliance maintenance and floor scrubbing, take time to organize other parts of your laundry room: – Group detergents, stain removers, dryer sheets, etc. , into labeled bins for easy access. – Install wall-mounted shelving units if space allows. – Declutter items you no longer use (e. g. , expired detergents).

Cleaning Task Recommended Frequency Tools Needed
Washing machine cleaning Monthly Vinegar, microfiber cloth
Dryer vent maintenance Every 2–4 months Vacuum/brush attachment
Floor mopping Weekly Mop, appropriate floor cleaner
Organizing supplies Quarterly Bins/labels

By following these steps consistently, you’ll maintain not only a visually appealing laundry room but also ensure more efficient operation of appliances while reducing allergens caused by dust accumulation in this often-neglected area. Proper care now can save money on repair costs later while creating an inviting space you’ll appreciate every time you do laundry.


Woman cleaning the house Woman cleaning the house standard Cleaning stock pictures, royalty-free photos & images

Preparing your home before a professional cleaning service arrives can ensure that the cleaners work efficiently and provide the best results possible. By taking a few simple steps, you can streamline the process and maximize the value of your investment. Here are some tips to help you get your home ready.

Declutter Common Areas

Before the cleaning team arrives, it’s essential to remove clutter from surfaces and floors. This allows the cleaners to focus on actual cleaning tasks instead of spending time moving items out of their way.

  • Pick up personal belongings: Gather items like clothes, toys, or paperwork scattered around.
  • Clear countertops: Remove appliances, dishes, or other objects from kitchen and bathroom counters.
  • Organize living spaces: Place books, magazines, or remote controls in their designated spots.

A tidy environment will ensure that cleaners can focus on detailed tasks rather than organizing your home.

Secure Valuables and Personal Items

While most professional cleaning companies hire trustworthy staff, it’s always a good idea to safeguard sensitive or valuable items as a precaution.

  • Store jewelry, cash, or important documents in a secure place.
  • Lock away fragile objects like heirlooms or antiques that could accidentally break during cleaning.
  • Remove any personal items you wouldn’t want others handling.

This proactive approach minimizes potential misunderstandings and protects cherished belongings.

Communicate Special Requests

If there are specific areas you want attention focused on—or areas you would prefer left alone—make this clear ahead of time. Providing detailed instructions helps ensure that your expectations are met.

  • Requesting extra care for high-touch surfaces (e.g., light switches, door handles).
  • Specifying certain rooms for deep cleaning while skipping others (e.g., guest bedrooms).
  • Highlighting unique flooring materials or furniture that require special products or techniques.

Being transparent about your needs eliminates confusion and increases satisfaction with the service provided.

Ensure Accessibility

  • Remove any obstacles from stairways.
  • Provide clear instructions if certain levels require different levels of care.

Cleaners will appreciate an open workspace free from barriers to their tasks.

Provide Necessary Supplies (If Required)

Cleaning Item Purpose
HEPA filter vacuum Ideal for homes with allergies
Eco-friendly sprays Safer for homes with children/pets
Specialty mops Suitable for delicate hardwood floors

Confirm details in advance so there’s no last-minute confusion when they arrive at your home.

By taking these steps prior to a maid service visit, you create an environment where professionals can perform at their best while respecting your personal preferences. Thoughtful preparation ensures both parties have a positive experience during every visit.

Step-by-Step Guide to Preparing for a Cleaning Service Washington DC

Preparing your home for a maid service doesn’t only ensure you get the most out of the cleaning session, but it also helps the cleaning team work efficiently. By decluttering and organizing before their arrival, you create a more productive environment for thorough cleaning. Below is a step-by-step guide to help you prepare effectively.

Step 1: Remove Unnecessary Clutter

Clutter can obstruct surfaces and make it harder for cleaners to do their job efficiently. Start by identifying spaces where items tend to pile up, such as countertops, coffee tables, or bathroom sinks.

  • Clear out items like mail, magazines, dishes, or toys.
  • Focus on one area at a time to avoid feeling overwhelmed.
  • Use baskets or bins to temporarily store items that don’t have a designated space yet.

Step 2: Organize Personal Belongings

Organizing personal belongings ensures that nothing important gets misplaced during the cleaning process.

  • Gather Loose Items: Collect items such as clothes, electronics, or keys scattered across your home and place them in designated storage areas.
  • Arrange Furniture: If possible, move smaller furniture pieces slightly away from walls or cluttered spaces so cleaners can access harder-to-reach areas.

Step 3: Safeguard Valuables and Fragile Items

Before the maid service arrives, take time to safeguard fragile and valuable belongings.

Item Type Action Required
Jewelry & Cash Store in locked drawers or safes.
Fragile Decorations Place in secure cabinets or boxes.
Sentimental Items Relocate to rooms not being cleaned.

Taking such precautions reduces any risk of accidental damage during the cleaning process.

Step 4: Identify Priority Areas for Cleaning

Review which areas require extra attention during this visit. Prioritizing specific areas will help ensure those spots are adequately cleaned within the scheduled time frame.

  • Think about high-traffic zones like kitchens or bathrooms where grime builds up faster.
  • For deep-cleaning services, highlight neglected spaces like baseboards or ceiling fans.

Tip: Write down these priority areas so you can communicate them clearly to your cleaning team before they begin work.

Step 5: Secure Pets and Inform Your Cleaning Team

  • Keep them in secured rooms away from areas being cleaned.
  • Alternatively, arrange for someone else to care for them during the appointment.

Inform your cleaners if pets will remain on-site so they know how to approach your home accordingly.

Benefits of Decluttering Before Maid Services

  1. Cleaners can focus more on deeper cleaning tasks rather than tidying up scattered belongings.
  2. The results of each session will be more noticeable since surfaces are easier to access.
  3. You’ll enjoy peace of mind knowing sensitive items are safely stored away.

With this preparation routine in place, you’re setting both yourself and your maid service up for success every time they visit!

Essential Tips from Cleaners Washington DC to Protect Valuables and Fragile Items Before Cleaning

When preparing for a professional maid service, it’s essential to take specific precautions to protect your valuables and fragile items. Not only does this ensure the safety of your cherished possessions, but it also allows the cleaning team to work without unnecessary worry or hesitation. Below are key reasons why safeguarding these items before a cleaning session is critical.

Preventing Accidental Damage

Cleaning professionals are trained to handle homes with care, but accidents can occasionally happen. By securing delicate or irreplaceable items in safe locations, you minimize the risk of:
Breakage or chips: Fragile glassware, ceramics, or decorative pieces may inadvertently fall or get knocked over during cleaning.
Scratches or dents: Metal heirlooms, antiques, and polished surfaces can be prone to accidental scuff marks if left unsecured.

Reducing Liability Concerns

Although most professional maid services carry insurance for damages caused during their work, filing claims can be time-consuming and stressful. By taking proactive steps to store away valuables and fragile items, you help avoid situations that might require compensation discussions.

Keeping Sentimental Items Safe

Many homeowners own objects with sentimental value—family heirlooms, gifts from loved ones, or handmade crafts—that can’t be replaced if damaged. Safeguarding these items ensures they remain unscathed while allowing cleaners to focus on their job without anxiety over potentially damaging something irreplaceable.

Building Trust with Your Cleaning Team

When you secure valuable belongings ahead of time, it demonstrates thoughtfulness and responsibility as a homeowner. This fosters mutual trust between you and the cleaning service team by reducing potential misunderstandings regarding missing or damaged property.

Tips from a Cleaning Company Washington DC on Protecting Valuables and Fragile Items

  1. Create a Storage Space: Dedicate an area such as a closet or locked drawer where sensitive items like jewelry, watches, passports, and important documents can be kept securely.
  2. Label Fragile Areas: If there are specific zones in your home with fragile décor (e.g., glass cabinets), consider leaving notes for the cleaners so they know where to exercise extra caution.
  3. Remove Small Items from Surfaces: Clear countertops, shelves, and tables of small breakables like picture frames or small figurines.
  4. Use Protective Covers: For larger fragile furniture pieces like glass-top tables or delicate woodwork, consider using protective coverings before the cleaning session begins.
  5. Communicate Clearly: Inform the cleaning company ahead of time about particularly sensitive areas in your home so they can prepare appropriately.

Professional Maids Washington DC: Practical Tips for Safeguarding Your Items

Item Category Recommended Action Example Locations
Jewelry & Watches Place in a lockbox or safe Bedroom drawers
Important Documents Store in secure filing cabinets Home office
Glassware Remove from shelves Kitchen pantry/display units
Heirloom Decorations Pack carefully into padded containers Living room mantelpieces

Final Considerations Before House Cleaning Washington DC

By taking intentional steps to safeguard your valuables and fragile items before professional cleaners arrive at your home:
– You protect both priceless keepsakes and functional belongings from harm. – You contribute positively toward establishing an efficient working relationship with the maid service team. – You create a stress-free environment that ultimately benefits both parties.

With these measures in place, you’ll have peace of mind knowing that everything important is secure while enjoying the thorough results only professional services can provide.

Forget sweet, try "Home sanitised home" Cropped shot of a woman cleaning a kitchen counter at home standard Cleaning stock pictures, royalty-free photos & images

How to Effectively Provide Special Instructions for Your Cleaning Team

Providing clear and concise instructions to your cleaning team is essential to ensure your home is cleaned according to your specific preferences and needs. Communication not only avoids misunderstandings but also helps the cleaning team deliver better results. Here’s how you can effectively provide special instructions for a professional maid service.

Why Providing Special Instructions Matters

  • Ensure that high-priority areas receive extra care.
  • Clarify any specific cleaning techniques or products you prefer.
  • Avoid accidental damage or oversight of delicate fixtures or surfaces.
  • Minimize the need for corrections after the service.

Preparing Your Instructions

  1. Identify areas that need extra attention (e.g., kitchen appliances, corners with pet hair).
  2. Highlight spaces that can be skipped (e.g., guest rooms not in use).
  3. Instead of saying “clean the bathroom,” specify tasks such as scrubbing tiles, sanitizing countertops, or descaling showerheads.
  4. If necessary, label certain rooms or items with sticky notes (e.g., “Please don’t touch” for fragile décor).
  5. Share photos or videos if you aren’t able to meet the team in person.
  6. Let the team know if they should avoid certain chemicals due to allergies or sensitivities in your household.
  7. Specify if you’d like them to use eco-friendly cleaners or your own preferred supplies.

Best Practices for Communicating With Your Cleaning Team

  • Provide Written Instructions: Writing down detailed guidelines ensures nothing gets forgotten during verbal communication.
  • Discuss Problem Areas in Person: If possible, do a quick walkthrough of your home when the team arrives and point out any high-priority zones.
  • Set Realistic Expectations: Be clear about what you expect within the allotted time frame—this helps prevent misunderstandings about job scope.

Example Table: Key Areas and Possible Instructions

Area Specific Instruction Notes
Kitchen Wipe down all appliances externally Use non-abrasive cleaners
Living Room Vacuum under furniture Avoid moving heavy pieces
Bathroom Scrub grout lines and disinfect countertops Use bleach-free solutions
Bedroom Dust all surfaces including baseboards Do not rearrange décor

Following Up After Service

After the cleaning session ends, take a few minutes to inspect key areas based on your provided instructions. Offer feedback—positive reinforcement encourages good work while constructive criticism ensures improvements next time around.

Providing special instructions isn’t just about ensuring cleanliness; it’s also about creating mutual respect between you and the cleaning professionals who care for your space. Clear guidance leads to better results for everyone involved.

How to Effectively Provide Special Instructions for Your Cleaning Team

To ensure a professional cleaning service meets your expectations, effective communication is essential. Providing clear and concise instructions allows the cleaning team to understand your preferences, prioritize specific areas, and deliver tailored results. Below is a comprehensive guide on how to effectively communicate special instructions for your cleaning team.

Benefits of Providing Special Instructions

  • Customized Cleaning: The service is tailored to meet your unique needs, ensuring attention to areas of concern.
  • Time Efficiency: Clearly outlined priorities help the team allocate time effectively.
  • Reduced Misunderstandings: Clear instructions prevent confusion or missed tasks.
  • Prolonged Maintenance: Specific requests can focus on preserving delicate surfaces or furniture.

Best Practices for Communicating Your Needs

  1. List the specific tasks you want addressed (e.g., dusting blinds, wiping baseboards).
  2. Highlight problem areas that require extra attention, such as grease in kitchens or grout in bathrooms.
  3. Specify which rooms or spaces need the most focus (e.g., “Focus more on the living room and kitchen”).
  4. Mention any low-priority zones that don’t require detailed cleaning.
  5. Point out delicate items like antiques, electronics, artwork, or collectibles that need extra care.
  6. Specify whether certain items should not be touched (e.g., “Do not clean inside this cabinet”).
  7. Address Allergies or Sensitivities
    Inform the team of any allergies to cleaning products or preferences for eco-friendly solutions.
  8. Offer clear instructions on how cleaners will access your home if you’re not present (e.g., where spare keys are located).
  9. Mention if pets are inside and whether specific precautions are needed for their safety.
  10. Use Visual Aids When Possible
    If verbal explanations may not suffice, consider leaving sticky notes in rooms with additional details or using pictures highlighting areas of concern.

Sample Instruction Checklist

Task Priority Level Additional Notes
Dust all surfaces in living room High Pay special attention to shelves and lamps
Clean window sills Medium Ensure no water drips onto curtains
Mop kitchen floors High Use provided laminate-safe cleaner
Vacuum carpets High Focus under furniture where dust accumulates
Sanitize bathroom counters Medium Avoid harsh chemicals near marble surfaces

What Not To Overlook

When providing instructions to a maid service, avoid omitting critical details such as: – Areas you want skipped entirely. – Preferences regarding how supplies should be used. – Timing constraints (if work must be completed within certain hours).

Effective communication ensures that both you and the cleaning team have aligned expectations — laying the foundation for a productive partnership built on trust and results-oriented service delivery.

Be Clear About Your Expectations

  • Prioritize Tasks: Create a checklist of areas or tasks that require extra attention, such as scrubbing grout, dusting ceiling fans, or addressing pet hair on furniture.
  • Point Out Preferences: If you have specific requirements, such as using eco-friendly products or avoiding certain cleaning agents due to allergies, make sure to communicate this in advance.
  • Discuss Boundaries: Let the cleaners know which rooms or items are off-limits if applicable.

Prepare Your Home Ahead of Time

  1. Declutter Surfaces: Remove personal items like mail, toys, or clothes from countertops and floors to allow better access for thorough cleaning.
  2. Secure Valuables: Store fragile items, jewelry, or important documents in a safe location to avoid accidental damage or misplacement.
  3. Provide Access: Ensure cleaners can easily enter your home by offering keys, codes, or access instructions if you’re not present during their visit.

Treat Cleaners with Respect

  • Be Polite and Welcoming: Greet them warmly upon arrival and provide any last-minute updates about the job.
  • Avoid Micromanaging: Trust their expertise and let them work without constant supervision unless clarification is needed on specific tasks.
  • Offer Refreshments Thoughtfully: While optional, offering water or coffee demonstrates appreciation for their efforts.

Timing Your Appointment

  • Be punctual if you need to be home during the service.
  • Allow adequate time for cleaners to complete their job thoroughly without rushing them.
  • If you need to reschedule an appointment, notify the service provider as far in advance as possible.
Etiquette Tip Why It Matters
Communicate clearly Prevents misunderstandings about expectations
Declutter beforehand Saves time and enhances efficiency
Show respect Builds trust and fosters positive relations

Tipping Practices

  • The standard tip range is typically 10–20% of the service cost.
  • Alternatively, you can offer cash tips directly or include them when paying by card through platforms that allow tipping.

By following these etiquette guidelines thoughtfully, you create an environment where both you and the maid service providers feel valued—leading to better outcomes and consistent satisfaction over time.

What Factors Determine the Average Cost of House Cleaning Services?

Understanding the cost of house cleaning services can help you make an informed decision when hiring a professional cleaning team. Several factors influence the overall price, and being aware of these can give you a better idea of what to expect.

1. Size of Your Home

The size of your home is one of the most significant factors affecting costs. Larger homes require more time, effort, and cleaning supplies, which increases the price.

  • Apartments or condos: Typically cost less due to their smaller square footage.
  • Single-family homes: Pricing increases with additional bedrooms, bathrooms, and multiple levels.
Home Size Estimated Cost Range (Per Visit)
Studio/1-bedroom $75 – $120
Medium-sized house $150 – $250
Large house (4+ BR) $300+

2. Frequency of Service

The frequency at which you schedule cleanings also affects pricing. Regularly scheduled cleanings tend to be more affordable per visit compared to one-time deep cleans.

  • Weekly or bi-weekly cleanings: Lower per-visit cost due to recurring service.
  • Monthly or one-time cleans: Higher rates because more buildup typically needs attention.

Scheduling consistent visits often reduces labor intensity for each session, making it a cost-effective option in the long term.

3. Type of Cleaning Service Required

  • Basic/Standard Cleaning: Focuses on general dusting, vacuuming, mopping, and light surface wiping.
  • Deep Cleaning: Involves intensive tasks like baseboard scrubbing or oven cleaning.
  • Move-In/Move-Out Cleaning: Includes additional services such as carpet shampooing or removing debris left behind.

Deep or specialized cleanings generally have higher fees compared to regular appointments due to their thorough nature.

4. Geographic Location

  • Urban areas typically charge more than rural regions.
  • Demand for services in your area can further influence rates.

For example: – A standard two-bedroom apartment in a metropolitan area may cost around $150 for basic cleaning. – The same service in a suburban town could be closer to $100.

5. Condition of Your Home

  • Excess clutter or grime increases labor time.
  • Specialty tools/supplies needed for heavy-duty tasks may incur extra fees.

Cleaning teams generally conduct assessments before providing final quotes for homes requiring extensive efforts.

6. Special Requests and Add-On Services

Examples include: – Carpet shampooing – Window washing – Polishing furniture These add-ons require additional equipment and time, which raises overall charges.

Some providers offer packages to bundle these extras at discounted rates compared to à la carte options.

7. Number of Cleaners Assigned

Number of Cleaners Impact on Price
Single cleaner Lower hourly rate but longer total cleaning time
Two+ cleaners (team-based) Higher hourly rate but faster completion

Teams are often deployed for larger homes or tight schedules, while single cleaners may be ideal for smaller spaces on flexible timelines.

By understanding these factors—home size, frequency, location, type of service needed—you’ll be better equipped to budget appropriately when hiring professional maid services tailored specifically to your needs.

Young woman cleaning house Close-up of young woman mopping the floor standard Cleaning stock pictures, royalty-free photos & images

Moving into a new apartment is an exciting milestone, but keeping your space clean and comfortable requires preparation. Equipping yourself with the right cleaning essentials from the start ensures your home remains fresh, tidy, and welcoming. Here’s a comprehensive guide to the cleaning necessities you’ll need for your new apartment.

Basic Cleaning Supplies

A well-stocked cleaning arsenal begins with versatile tools that can tackle everyday messes.
All-Purpose Cleaner: Perfect for countertops, appliances, and general surface cleaning. Look for cleaners that are safe for multiple surfaces like wood, glass, or tile.
Microfiber Cloths: These reusable cloths trap dust effectively without leaving streaks behind. They’re great for surfaces such as mirrors and electronics.
Sponges and Scrub Brushes: Use sponges with a soft side for gentle scrubbing and tougher scrub brushes for heavier grime in sinks or tubs.
Vacuum Cleaner: Whether you have carpet, hardwood floors, or tiles, a vacuum cleaner with adjustable settings is essential to pick up dirt and debris efficiently.
Broom and Dustpan: For quick cleanups of crumbs or dirt on hard floors.

Must-Have Cleaning Products

Stocking up on the right chemical solutions ensures every part of your apartment can be cleaned thoroughly:
| Cleaning Product | Purpose | Suggested Use | |————————–|——————————————-|———————————————————-| | Glass Cleaner | Leaves windows and mirrors streak-free | Spray on glass surfaces; wipe with a microfiber cloth | | Dish Soap | Cleans dishes and removes grease | Use in sinks or mix with water for light degreasing | | Disinfectant Spray | Kills germs on high-touch surfaces | Apply to doorknobs, light switches, remotes | | Bathroom Cleaner | Removes soap scum and buildup | Use in showers, bathtubs, sinks | | Floor Cleaner (Specialized) | Keeps floors spotless | Choose one based on flooring type (tile, wood, laminate) |

Tools to Keep Your Space Organized

  • Storage Caddy: Store all your essential cleaning supplies in one portable container so you can easily carry them from room to room during clean-ups.
  • Trash Bags: Always have various sizes available to fit kitchen bins as well as smaller wastebaskets in bedrooms or bathrooms.
  • Laundry Basket: This prevents dirty clothes from piling up around your living space.
  • Extendable Duster: Great for reaching high corners or ceiling fans where dust collects.

Additional Considerations

Moving into an apartment may require attention to specific areas depending on its layout or prior use: – If you’re renting an older unit or one that’s been vacant for some time, consider investing in mold removers or heavy-duty cleaners. – Don’t forget air fresheners—either sprays or natural options like essential oil diffusers—to keep your apartment smelling clean.

Thoughtfully assembling these essentials will save time during routine maintenance while minimizing stress when unexpected messes occur.

A clean and sparkling home is not only visually appealing but also contributes to a healthier living environment. Using the right cleaning products can make all the difference in achieving a spotless space. Below, we explore some essential cleaning products you should consider for maintaining your home’s sparkle and shine.

All-Purpose Cleaner

An all-purpose cleaner is one of the most versatile cleaning products you can own. It works effectively on multiple surfaces, such as countertops, appliances, and doorknobs. Look for non-toxic or biodegradable options to ensure safety for your family and the environment.

Benefits: – Convenient for daily cleaning – Saves time by eliminating the need for multiple specialized cleaners – Works on most non-porous surfaces

Glass Cleaner

To achieve streak-free windows, mirrors, and glass tabletops, a high-quality glass cleaner is essential. Many eco-friendly glass cleaners are now available that are free from ammonia yet still highly effective.

Tips for Best Use:1. Use a microfiber cloth for wiping. 2. Spray sparingly—too much product can leave streaks. 3. Clean during overcast days to reduce streaking caused by quick drying in sunlight.

Disinfectant Spray or Wipes

Disinfectants are crucial in maintaining hygiene, particularly on high-touch surfaces like light switches, handles, and phones. Choose EPA-approved disinfectants that kill 99. 9% of germs while being safe to use around food preparation areas.

Key Features to Look For: – Non-toxic ingredients if used around children or pets – Fragrance-free options to avoid strong chemical odors – Compatibility with various surfaces (wood, plastic, metal)

Floor Cleaner

Different flooring types require specific cleaning solutions:
| Flooring Type | Recommended Cleaner |
|——————|————————————————-|
| Hardwood | pH-neutral wood floor cleaner |
| Tile | Mild alkaline cleaner |
| Laminate | Water-based laminate-specific solution |

When choosing a product, verify its compatibility with your home’s flooring material to avoid damage over time.

Degreaser

A degreaser is indispensable when tackling kitchen grease buildup on stovetops, range hoods, and ovens. These solutions are designed specifically to cut through oily residue that regular cleaners may struggle with.

Where It’s Useful:
– Kitchen cooking equipment
– Outdoor grills
– Greasy spots on cabinets

Baking Soda and Vinegar (Natural Alternatives)

For those who prefer natural alternatives to commercial products, baking soda and vinegar are excellent choices:
1.Baking Soda– Ideal for deodorizing carpets or scrubbing tough stains off sinks and tubs. 2.White Vinegar– Effective as a natural disinfectant or descaler for coffee machines and kettles.

When combined as paste or spray (one part vinegar to one part water), they work well against stubborn grime across different areas of your home.

Air Fresheners

Though technically not traditional “cleaning” products, air fresheners enhance the atmosphere of your freshly cleaned home by ensuring it smells pleasant throughout the day. Consider using essential oil diffusers or natural odor eliminators like activated charcoal bags instead of synthetic sprays for long-lasting freshness without harsh chemicals.

Investing in quality cleaning products tailored to meet your household’s unique needs ensures efficiency while keeping every corner of your home spotless. Regular use of these essentials will maintain cleanliness while saving time during each cleaning session!

Cleaning Company Washington DC: Products That Make Your Home Sparkle

Maintaining a clean and sparkling home starts with selecting the right cleaning products. The key is to choose items that are both effective and safe for regular use. Below is a detailed guide to some of the best cleaning products you can include in your arsenal.

All-Purpose Cleaners

All-purpose cleaners are versatile and can be used on various surfaces, saving you time and effort. Look for biodegradable or non-toxic options for an environmentally friendly approach.

  • Multi-Surface Sprays: Ideal for countertops, tables, and other hard surfaces.
  • Disinfectant Wipes: Great for quick clean-ups in high-touch areas like door handles or remote controls.
  • Natural Vinegar-Based Solutions: Effective on glass, tile, and even as a deodorizer.

Glass Cleaners

Streak-free glass cleaners are essential for spotless windows, mirrors, and other reflective surfaces.

  • Choose ammonia-free formulas for safer indoor use.
  • Consider microfiber cloths to pair with the cleaner for a flawless finish.
Brand/Product Features Eco-Friendly Options?
Streak-Free Spray Streak prevention formula Yes
Vinegar-Based Cleaners Non-toxic ingredients Yes
Traditional Glass Spray Easy to find and affordable No

Floor Cleaning Solutions

Different floors require specialized care to preserve their beauty and longevity.

  • Hardwood Floors: Use pH-neutral cleaners that protect without stripping the finish.
  • Tile Floors: Opt for grout-specific cleaners to tackle tough stains.
  • Carpet Cleaners: Invest in a spot treatment spray or powder for removing stains quickly.

Degreasers and Heavy-Duty Products

  • Kitchen Degreasers: Break down oil build-up on stoves, ovens, and range hoods.
  • Bathroom Tile & Grout Cleaners: Remove mold and mildew effectively.

Look into citrus-based degreasers as an eco-friendly alternative.

Specialty Cleaning Products

  1. Stainless steel polish – Keeps appliances smudge-free.
  2. Wood furniture polish – Enhances natural wood grain while protecting it.
  3. Odor eliminators – Neutralize strong smells from pet areas or garbage bins.

Green Cleaning Alternatives

  1. Baking Soda – A gentle scrubber ideal for sinks or tubs.
  2. White Vinegar – Cuts grease while acting as a natural disinfectant.
  3. Lemon Juice – Perfect for removing stains while leaving a pleasant scent.

By combining green solutions with store-bought essentials, you can maintain a clean home while minimizing chemical exposure.

Regularly evaluate your cleaning product collection to ensure you’re using items suited to your home’s unique needs. With the right tools at hand, achieving a sparkling home becomes much more manageable!

Shot of a bucket of cleaning supplies Making my floors sparkle standard Cleaning stock pictures, royalty-free photos & images

Maids Washington DC Share Kitchen Cleaning Tips for a Spotless Cooking Space

Maintaining a clean kitchen is essential not only for aesthetic purposes but also for promoting hygiene and ensuring food safety. A spotless cooking space can make meal preparation more enjoyable and efficient. Below are practical tips and strategies to transform your kitchen into a sparkling, organized haven.

Focus on Daily Maintenance

A clean kitchen is easier to maintain when daily tasks are handled consistently.

  • Wipe Down Surfaces:After cooking or preparing meals, immediately clean countertops and stove tops to prevent stubborn stains.
  • Wash Dishes Immediately:Avoid letting dishes pile up in the sink. Washing them after use saves time and reduces clutter.
  • Sweep the Floor Daily:Kitchens are prone to crumbs and debris. A quick sweep each day minimizes dirt accumulation.
  • Empty the Trash Regularly:Dispose of waste frequently to avoid unpleasant odors or pests.

Break Cleaning Into Zones

  1. Use an all-purpose cleaner or a mixture of vinegar and water to disinfect surfaces.
  2. Declutter by storing items like small appliances, utensils, or spices in designated spaces.
  3. Scrub the sink with baking soda once a week for a deep clean.
  4. Soak faucets in white vinegar if mineral deposits build up.
  5. For stovetops, use degreasers or soapy water to lift grease stains effectively.
  6. Deep-clean ovens monthly using oven cleaners or natural solutions like baking soda paste.
  7. Wipe shelving weekly with mild soap or disinfectant wipes.
  8. Discard expired foods promptly and organize items by category for easy access.
  9. Mop floors weekly using warm water mixed with dish soap or floor-specific cleaners.
  10. Address spills immediately to prevent sticky residues.
Zone Frequency Recommended Cleaner
Countertops After each use All-purpose cleaner/vinegar
Sink Weekly Baking soda
Stove/Oven Daily/Monthly Degreaser/baking soda paste
Refrigerator Weekly Mild soap/disinfectant
Floors Weekly/Daily Dish soap/floor cleaner

Tackle Hard-to-Reach Areas

  • Clean behind large appliances like refrigerators and stoves every few months to remove dust buildup.
  • Dust light fixtures and range hood vents using microfiber cloths or vacuum attachments.
  • Wash cabinet doors with warm soapy water, especially near cooking areas where grease splatters occur.

Eco-Friendly Cleaning Alternatives

  • Mix equal parts of vinegar and water for an effective glass cleaner.
  • Create a natural degreaser by combining lemon juice with baking soda into a paste-like consistency.

Final Touches

After cleaning all zones:
1. Add an air freshener or simmer cinnamon sticks on the stove for a fresh scent.
2. Invest in decorative storage containers for utensils or pantry staples, giving your kitchen an organized look while keeping essentials within reach.

By following these steps consistently, you can maintain a spotless kitchen that promotes both functionality and comfort while reducing effort over time.

Bathroom Cleaning Must-Haves from a Top Maid Service Washington DC

Keeping your bathroom clean and inviting requires the right tools and products. A well-maintained bathroom not only enhances its appearance but also promotes hygiene. Below is a detailed guide on essential items and tips to ensure your bathroom remains spotless, fresh, and germ-free.

Top Tools for House Cleaning Washington DC Bathrooms

Having the proper tools makes bathroom cleaning more efficient and effective.

  • Scrub Brushes:A durable scrub brush is essential for removing grime from tiles, grout lines, sinks, and tubs. Opt for brushes with stiff bristles that can tackle tough stains.
  • Toilet Brush:Invest in a high-quality toilet brush with sturdy bristles to keep your toilet bowl sparkling clean.
  • Microfiber Cloths:These reusable cloths are perfect for wiping mirrors, countertops, and other surfaces without leaving streaks or lint.
  • Squeegee:Ideal for cleaning shower doors or tiles after use to prevent water stains and soap scum buildup.

Key Cleaning Products

Product Type Purpose Example Ingredients/Features
All-Purpose Cleaner Cleans countertops, sinks, & faucets Citrus-based or biodegradable solutions
Glass Cleaner Removes streaks from mirrors & glass Ammonia-free formulas for safer use
Tile & Grout Cleaner Breaks down grime in grout lines Oxygen bleach-based cleansers
Toilet Bowl Cleaner Eliminates stains & kills bacteria Contains disinfecting agents like hydrogen peroxide
Mold & Mildew Remover Gets rid of unsightly mold spots Chlorine or vinegar-based treatments

Steps to Deep Clean Your Bathroom

  1. Declutter Surfaces:Remove toiletries, decor items, or anything else from counters before starting to clean.
  2. Dust & Sweep:Dust light fixtures, vents, baseboards, and shelves first. Sweep or vacuum the floor to remove hair and debris.
  3. Apply Cleaners:Spray appropriate cleaners on high-use areas such as sinks, showers, toilets, and tubs. Let them sit for several minutes to break down dirt before scrubbing.
  4. Tackle Grout Lines:Use a grout brush dipped in tile cleaner to scrub between tiles effectively.
  5. Polish Mirrors & Glass Surfaces:Wipe mirrors with glass cleaner using microfiber cloths in circular motions until streak-free.
  6. Disinfect High-Touch Areas:Sanitize doorknobs, faucet handles, light switches, and other frequently touched spots using disinfecting wipes or sprays.
  7. Finish with Floors:Mop floors with a suitable cleaner designed specifically for tiled surfaces.

Pro Tips for Maintaining Bathroom Cleanliness

  • Keep an old toothbrush handy for cleaning hard-to-reach spots like faucet bases or shower door tracks.
  • Use a squeegee after every shower session to minimize water spots on glass doors.
  • Replace sponges regularly since they harbor bacteria over time.
  • Add air-purifying plants such as ferns or peace lilies to reduce humidity levels naturally.

By keeping these tools within reach and following consistent routines outlined above ensures bathrooms remain pleasant spaces—both functional yet aesthetically pleasing—for daily use while minimizing bacterial risks often associated w/ shared environments

Top Tips for Organizing and Storing Your Cleaning Supplies

Keeping your cleaning supplies well-organized and properly stored not only saves time but also ensures safety and efficiency. A clutter-free cleaning station allows you to quickly locate what you need, when you need it, while maintaining a tidy home. Below are some practical tips for organizing and storing your cleaning essentials.

Start by grouping similar items together. This makes it easier to find what you need and prevents the purchase of duplicate products.
All-purpose cleaners(e. g.
Bathroom-specific products(e. g.
Kitchen supplies(e. g.
Floor cleaning items(e. g.
Laundry detergents and fabric care products

By separating these categories, you can determine storage solutions tailored to the type of product.

Transparent bins or caddies are an excellent storage solution that allows you to see the contents at a glance.
– Prevent spills by containing liquid leaks in one area.
– Easy transport from one room to another when using portable caddies.

Label each bin or section so that you can quickly identify its contents without rummaging through multiple systems.

Assign designated spots for each category of supplies.

Area Ideal Items to Store Notes
Under the sink Dish soap, sponges, kitchen cleaners Use shelf risers for additional space
Cleaning closet Mops, brooms, vacuums Install hooks for hanging items
Laundry room Detergent, stain removers Use shelves or wall-mounted dispensers
Garage/basement Large stock of bulk cleaning products Store in cool, dry places

Ensure that hazardous materials like bleach or ammonia are kept out of reach of children or pets.

Make the most of vertical space with wall-mounted racks or hooks:
– Use pegboards to hang lightweight tools such as dusters or microfiber cloths.
– Install over-the-door organizers on closets for smaller items like gloves or scrub brushes.

This solution is particularly useful in small homes where space is limited.

Cleaning products can lose their effectiveness over time.
– Dispose of expired chemicals responsibly by following your local waste disposal guidelines. – Avoid overstocking supplies unless they’re frequently used essentials like paper towels.

If children or pets have access to areas where cleaning supplies are stored, prioritize safety with these tips:
– Use cabinets with childproof locks. – Place potentially harmful chemicals on higher shelves away from reach. – Opt for non-toxic alternatives when possible to reduce potential risks during accidental contact.

Final Thoughts on Organization

A well-organized system not only enhances efficiency but also ensures longevity for your tools and supplies while prioritizing household safety. By implementing these strategies, maintaining cleanliness in your home becomes an effortless part of your routine rather than a daunting task!


Woman in rubber gloves with basket of cleaning supplies ready to clean up Woman in rubber gloves with basket of cleaning supplies ready to clean up her apartment. Housewife has many household chores, domestic work and professional cleaning service. Low depth of field standard Cleaning stock pictures, royalty-free photos & images

Determining the right frequency for deep cleaning services depends on several factors, including your lifestyle, the size of your property, and specific health considerations. A structured cleaning schedule can improve indoor air quality, maintain hygiene, and ensure your home or office is a comfortable space. Let’s take a closer look at how often you should schedule deep cleaning and why it matters.

General Guidelines for Scheduling Deep Cleaning

  • Homes: For most households, scheduling a deep cleaning every 3-6 months is sufficient. However, households with children or pets may benefit from more frequent services.
  • Offices: Office spaces typically require deep cleaning quarterly. High-traffic areas may need more frequent attention to maintain cleanliness.
  • Seasonal Needs: Many people choose to book deep cleaning services at the start of spring or before major events such as holidays or gatherings.

Factors That May Require More Frequent Deep Cleaning

  1. Pets can shed fur and dander that settle into carpets and furniture.
  2. Regular deep cleaning helps reduce allergens caused by pets.
  3. Dust mites, pollen, and other allergens can accumulate over time.
  4. Homes with allergy sufferers benefit from monthly or bi-monthly deep cleanings.
  5. After renovations or construction projects, dust particles can linger despite surface-level cleanups.
  6. A thorough initial post-construction clean-up prevents debris buildup in hidden areas.
  7. Entryways, kitchens, and bathrooms tend to collect dirt faster than other areas.
  8. These zones may need targeted attention during routine cleanings between scheduled deep cleans.

Benefits of Regular Deep Cleaning Services

Benefit Description
Enhanced Indoor Air Quality Reduces dust particles and allergens for improved breathing conditions.
Prolonged Lifespan of Surfaces Protects furniture, carpets, and appliances by eliminating grime buildup.
Greater Productivity Clean spaces in offices boost employee morale and focus levels.

Tips for Maintaining Cleanliness Between Deep Cleans

  • Vacuum high-traffic areas weekly to minimize dust accumulation.
  • Wipe surfaces daily using appropriate disinfectants to prevent germ spread.
  • Adopt a “no-shoes” rule indoors to limit dirt tracking from outside.

By customizing your service frequency based on individual needs and maintaining cleanliness between visits, you’ll create an environment that promotes health and well-being all year long.

How Often You Should Hire Cleaners Washington DC for Professional Deep Cleaning Services

Determining how often you should schedule professional deep cleaning services depends on several factors. While surface cleaning can maintain the daily appearance of your home or office, deep cleaning addresses the buildup of dirt, grime, and allergens that accumulate over time. Below are key considerations to help you decide the frequency of professional deep cleaning based on your unique circumstances.

1. Size and Usage of the Space

The size and usage of your home or office play a significant role in determining how often professional cleaning is needed.

  • For smaller households with one or two residents, a deep cleaning every 3-4 months may suffice.
  • Larger families or homes with children and pets may require frequent services, such as every 1-2 months.
  • Offices with high foot traffic or shared workspaces may need monthly deep cleanings.
  • Private offices with fewer employees might manage well with quarterly cleanings.

2. Lifestyle and Habits

  • Pets: Homes with pets tend to gather more fur, dander, and odors. If you own cats or dogs, more frequent cleanings (every 1-2 months) are recommended.
  • Cooking Frequency: Regular cooking can cause grease buildup on kitchen surfaces and appliances. Avid home chefs might benefit from scheduling monthly deep cleanings.
  • Smoking Indoors: Smoke residues accumulate on furniture, walls, and ceilings over time and require specialized attention during a deep clean.

3. Presence of Allergies or Health Concerns

Those who suffer from allergies or respiratory issues may need to prioritize regular deep cleaning to remove allergens like dust mites, mold spores, pollen, and pet dander.

Health Factor Recommended Frequency
Severe allergies Every month
Asthma Monthly to bi-monthly
No known health concerns Every quarter

4. Seasonal Changes

  • Spring: Pollen levels rise in springtime; consider scheduling a thorough service to minimize allergy triggers.
  • Winter: Indoor heating systems stir up dust particles; winter is an ideal time for a detailed cleanup.
  • Post-Holiday Season: After holiday gatherings or celebrations at home, hiring a professional cleaner ensures all spaces are restored to their original condition.

5. Clutter Level in the Space

  • Opt for more frequent intervention from professionals (e.g., bi-monthly).
  • Quarterly appointments might be sufficient.

Suggested Cleaning Schedule Based on Common Scenarios:

Scenario Recommended Frequency
Single occupant living alone Every six months
Family household with children Every two months
Office setting (low foot traffic) Quarterly
Office setting (high foot traffic) Monthly

By evaluating these factors carefully, you can create an optimal schedule that keeps your home or office fresh, healthy, and well-maintained without unnecessary expenses. Deep cleaning not only enhances aesthetics but also promotes better air quality and hygiene standards tailored specifically for your needs.

General Areas

  • Dusting: High-touch surfaces such as shelves, baseboards, picture frames, light fixtures, and ceiling fans are dusted to remove accumulated grime.
  • Vacuuming & Mopping: Carpets, rugs, and hardwood floors are vacuumed meticulously. Hard surfaces like tile or wood flooring are scrubbed and mopped for a polished finish.
  • Windows & Blinds: Windowsills are wiped down, blinds or shades cleaned thoroughly, and glass panes polished for streak-free clarity.
  • Furniture Cleaning: Upholstery is vacuumed to remove crumbs, pet hair, and debris. Wooden furniture is wiped with appropriate cleaners for longevity.

Kitchen

  • The exterior of appliances like refrigerators, ovens, microwaves, dishwashers, and stovetops is wiped down.
  • Interior cleaning may also be performed on items like ovens or microwaves if requested.
  • Cabinets & Drawers: Handles are disinfected while the inside of cabinets may be emptied and cleaned upon request.
  • Countertops & Backsplashes: Sanitized to remove stains from spills or grime buildup.
  • Sink & Faucet Descaling: Stubborn water spots or soap scum around sinks are removed for a sparkling finish.

Bathrooms

  • Shower Walls & Doors: Scrubbing tiles/grout lines as well as polishing glass doors free from soap scum.

Janitor use floor scrubber machine on the floor hallway office building or walkway after school and classroom work job with sun light background. Janitor use floor scrubber machine on the floor hallway office building or walkway after school and classroom work job with sun light background. Wet floor or cleaning service house maid concept. standard Cleaning stock pictures, royalty-free photos & images

Healthy Home Cleaning Tips for Allergy Season with Maid Service Washington DC

Allergy season can be a challenging time for individuals who suffer from allergies. Dust, pollen, pet dander, and other allergens tend to accumulate more during certain times of the year, making it crucial to maintain a clean indoor environment. Professional maid services can help significantly in reducing allergens in your home and improving overall air quality. Below are practical cleaning tips that can keep your living space healthy during allergy season.

Maids Washington DC: Tips for Tackling High-Allergen Areas

  • Carpets and Rugs: Vacuuming alone often isn’t enough. Professional cleaners use HEPA-filter vacuums or steam cleaning solutions to remove embedded allergens.
  • Upholstery: Sofas, chairs, and other fabric furniture trap pet dander and dust mites. Specialized cleaning methods ensure thorough allergen removal.
  • Curtains and Blinds: These frequently overlooked items can harbor dust and pollen. Maid services often include cleaning or laundering curtains as part of their service.
  • Air Vents: Dust buildup in vents circulates throughout the home, especially during allergy season. Professionals will ensure vents are cleaned properly.

Allergen-Friendly House Cleaning Washington DC Services

  • Free of harsh chemicals like ammonia or bleach.
  • Formulated without artificial fragrances or dyes.
  • Approved by asthma or allergy organizations.

This ensures your home remains both clean and safe for those with respiratory concerns.

Create a Weekly Cleaning Schedule

Day Task
Monday Mop floors and vacuum carpets
Wednesday Dust all surfaces
Friday Wash bedding & linens

Professional cleaners can support these tasks by handling more intensive jobs like deep-cleaning bathrooms, kitchens, or upholstery.

Control Humidity Levels

  • Bathrooms: Scrubbing grout lines, shower doors, and tiles thoroughly to prevent mold buildup.
  • Basements: Removing dust from damp-prone areas like storage spaces using specialized tools.

Additionally, they may recommend using dehumidifiers to maintain ideal indoor humidity levels (30–50%).

Additional Tips for Reducing Allergens

  1. Frequent Bedding Changes
    Wash sheets weekly in hot water (130°F/54°C) to kill dust mites.
  2. Pet Grooming Maintenance
    While maids won’t groom pets directly, they do clean fur-dense areas where pet dander tends to accumulate.
  3. Window Maintenance
    During spring or fall when pollen counts rise, professionals clean windowsills and screens regularly.

By employing these steps with professional maid services’ expertise, you’ll create an environment where allergens are minimized so you can breathe easier all season long while enjoying a healthier home environment.

Post-Party Cleaning Made Easy with the Help of Professional Maid Services

Hosting a party is an exciting experience, but the post-event cleanup can often feel overwhelming. From food spills to stray decorations, restoring your space to its original state takes significant effort. Professional maid services can streamline this process, saving you time and hassle while ensuring a thorough clean-up.

Benefits of Hiring Maid Services for Post-Party Cleanup

  1. Time-Saving
    Cleaning up after a party can take hours or even an entire day, depending on the size of the event. Professional maids work efficiently, allowing you to relax or focus on other responsibilities.
  2. Thorough Cleaning
    Professionals are trained to spot and address messes that are easy to overlook, such as spilled drinks in hard-to-reach corners or food crumbs hidden between furniture cushions.
  3. Stress-Free Process
    Post-party cleaning often feels daunting due to the sheer volume of tasks involved. Hiring professionals reduces this stress by delegating the responsibility to experienced cleaners.

Typical Tasks Included in Post-Party Cleaning Services

Task Description
Trash Removal Collecting and removing garbage, including disposable cups, plates, and napkins.
Dishwashing Washing glassware, dinnerware, and utensils used during the event.
Surface Cleaning Wiping down tables, countertops, and other surfaces to remove stains or residue.
Vacuuming & Sweeping Removing debris from carpets and floors for a spotless finish.
Stain Removal Tackling stubborn stains on furniture or flooring caused by spills.
Bathroom Sanitization Deep cleaning bathrooms used by guests during the event.

These services help ensure your home is not only clean but also hygienic after hosting large gatherings.

Tips for Preparing Your Home for Post-Party Cleanup

  • Separate recyclable items from general trash.
  • Store valuable or fragile items in safe locations before hosting your party.
  • Identify specific areas or spots requiring extra attention (e.g., drink stains on upholstery).
  • Inform cleaners in advance about any special requirements related to cleaning supplies or sensitive surfaces.

Why Choose Professionals Over DIY?

  • They use industrial-grade equipment and products that deliver better results than standard household tools.
  • Their expertise ensures efficient cleaning without causing damage to delicate surfaces like hardwood flooring.
  • They follow best practices related to sanitation and waste disposal.

If post-event exhaustion leaves you dreading cleanup duties, trusting professional maid services can be a practical solution that guarantees excellent results with minimal stress on your part.

By enlisting experts for post-party cleaning tasks, you’ll save time while extending the life of furniture and flooring through proper care—allowing you more opportunities to enjoy hosting without worrying about what comes next after the festivities end.